You've probably already heard: Flexmail is taking a big step on 30 January 2026. The old drag and drop builder is retiring and making way for a brand new version.
We understand that switching to a new tool raises questions. That's why we're laying out everything you need to know in this blog. This year, we've shown in two webinars just how intuitive the new builder actually is.
We'll take you through both webinars. You'll learn about the differences, understand why this change is coming, and get practical tools to get started quickly. Spoiler: it'll go much faster than you think.
Below, we also answer the most important questions we received in the webinars and in our support inbox. If you still have questions after reading this blog and watching the webinars, don't hesitate to contact us. We're always ready to help you further!
Two webinars, two levels
We've recorded two webinars. They're similar, but each has its own focus.Webinar 1: First introduction
In this webinar, we gave a tour of the builder at the launch in early 2025. Here you'll learn the fundamentals: how to create an email, how to drag elements, how to format your email. This is perfect if you're getting acquainted with Flexmail or email builders in general. You'll get all the basic tools you need, step by step.

In this webinar, we gave a tour of the builder at the launch in early 2025. Here you'll learn the fundamentals: how to create an email, how to drag elements, how to format your email. This is perfect if you're getting acquainted with Flexmail or email builders in general. You'll get all the basic tools you need, step by step.
Webinar 2: Advanced topics and new features
This webinar from October 2025 goes deeper and has a faster pace. It focuses on templates and converting your existing messages – or emails from another platform – as a new template in Flexmail's email builder. You'll also see new features that have been added since January, such as templates and dynamic content. This is for users who have already built up some routine and want to know how they can efficiently switch to the new builder.

This webinar from October 2025 goes deeper and has a faster pace. It focuses on templates and converting your existing messages – or emails from another platform – as a new template in Flexmail's email builder. You'll also see new features that have been added since January, such as templates and dynamic content. This is for users who have already built up some routine and want to know how they can efficiently switch to the new builder.
Which webinar is most suitable for you?
Which one should you choose? Watch webinar 1 if you feel you're missing basic knowledge. Webinar 2 is your goldmine if you already have some routine and want to know how to smartly transfer your current setup.
Why this change?
This is the question many customers asked: why now? Why not convert everything automatically?The answer is honest: it wasn't technically possible. The new builder hasn't just gotten a different appearance, the code behind it is also fundamentally built differently.
By letting go of that old architecture, we've created space for everything customers want. Faster, stable, flexible and more freedom in styling, both for desktop and mobile.
Is it work? Yes, rebuilding your templates takes effort. But you're investing in a future where you create emails faster, have more design possibilities, and experience fewer technical frustrations.
You also don't have to rebuild all your emails. After the deadline, we'll convert all your existing legacy builder messages to HTML. You can still send them, and there's no impact on running automation flows either.
Just prepare the templates you need and start from that starting point.
Your existing emails will continue to work. They'll be converted to HTML and remain sendable. You just won't be able to open and edit them in a builder context anymore.
No, unfortunately this isn't possible. Because the new builder is built in a fundamentally different way than the old one, messages and templates cannot be automatically converted, copied or duplicated to the new builder. Even after 30 January 2025, you won't be able to edit existing messages in the new builder – they'll remain sendable, but only as HTML.
We understand this means extra work. The webinars above help you get started quickly with rebuilding your most important templates in the new builder.
We understand this means extra work. The webinars above help you get started quickly with rebuilding your most important templates in the new builder.
Honestly? For your first email, maybe 30 minutes. For your third? 10 minutes. After that, you'll be faster than in the old builder.
Throughout your account, there's one shared media library. So regardless of the chosen design tool, you can use the same images.
What has actually changed?
The new builder doesn't just look different: it works fundamentally differently. And that's good news.The old builder sometimes felt cumbersome. You searched for settings, you clicked back and forth, you lost your overview. The new builder, on the other hand, is built for speed and clarity. The entire workflow therefore works faster.
The old builder had limitations. Not because it was poorly designed, but because the technology behind it was outdated. The new builder is built with modern technology. And that means: more control and more possibilities.
Dragging elements was once the future. Now it's standard. But in the new builder, drag and drop really works well. You drop elements more precisely. You immediately see where they'll land. It feels natural – like physical blocks you're moving on a canvas.
The interface: more space, more clarity
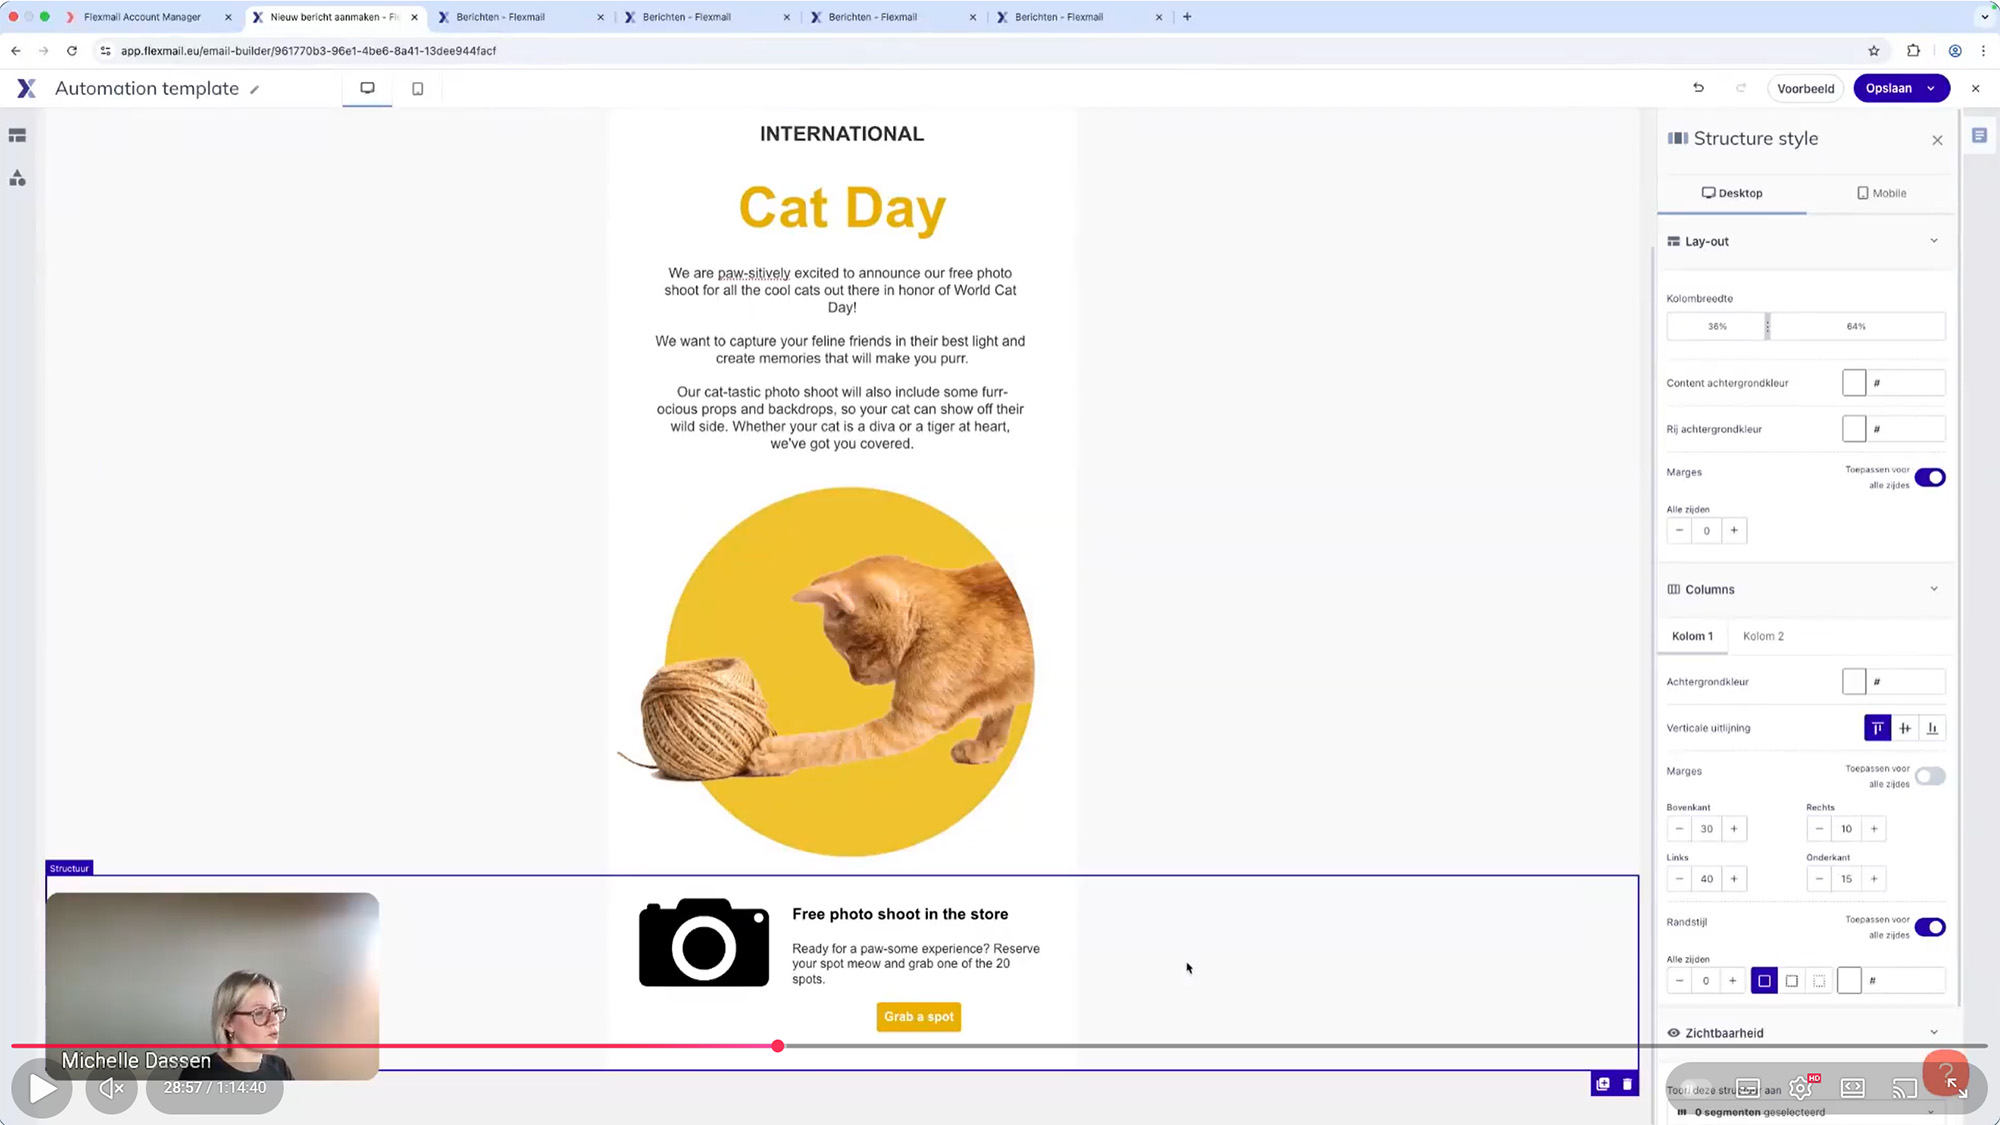
On the right, you used to have a large menu that constantly took up space. In the new builder? We throw that away and replace it with a new approach.You now see:
- Left: a sliding bar with all the elements and structures you can place
- Middle: your canvas. Large, spacious, full of workspace and full screen
- Right: settings for exactly what you've selected
To create a new message, go to campaigns > messages. There you click the "Create new message" button and follow the steps. There you can choose to start from a template or a blank page.
It looks like you're still on an outdated version. We recommend switching as soon as possible.
Autosave is gone, but that's actually better
In the old builder, we spent a lot of energy on autosave. It sounds handy, but in practice it caused problems. Emails that changed unexpectedly. Versions that overwrote each other. Users who didn't know which version they actually wanted to restore.In the new builder, we work differently. You have undo and redo: you can undo or redo all the steps you take. That gives you much more control. And that also works with your familiar keyboard shortcuts.
And yes, you have to save manually. But that's a good habit. Every time you make a big change, you save. You know exactly what you've saved and what you haven't. No more surprises.
Structure versus styling: finally separated
The old builder mixed structure and styling together. You constantly had to click back and forth to adjust something.The new builder thinks more logically:
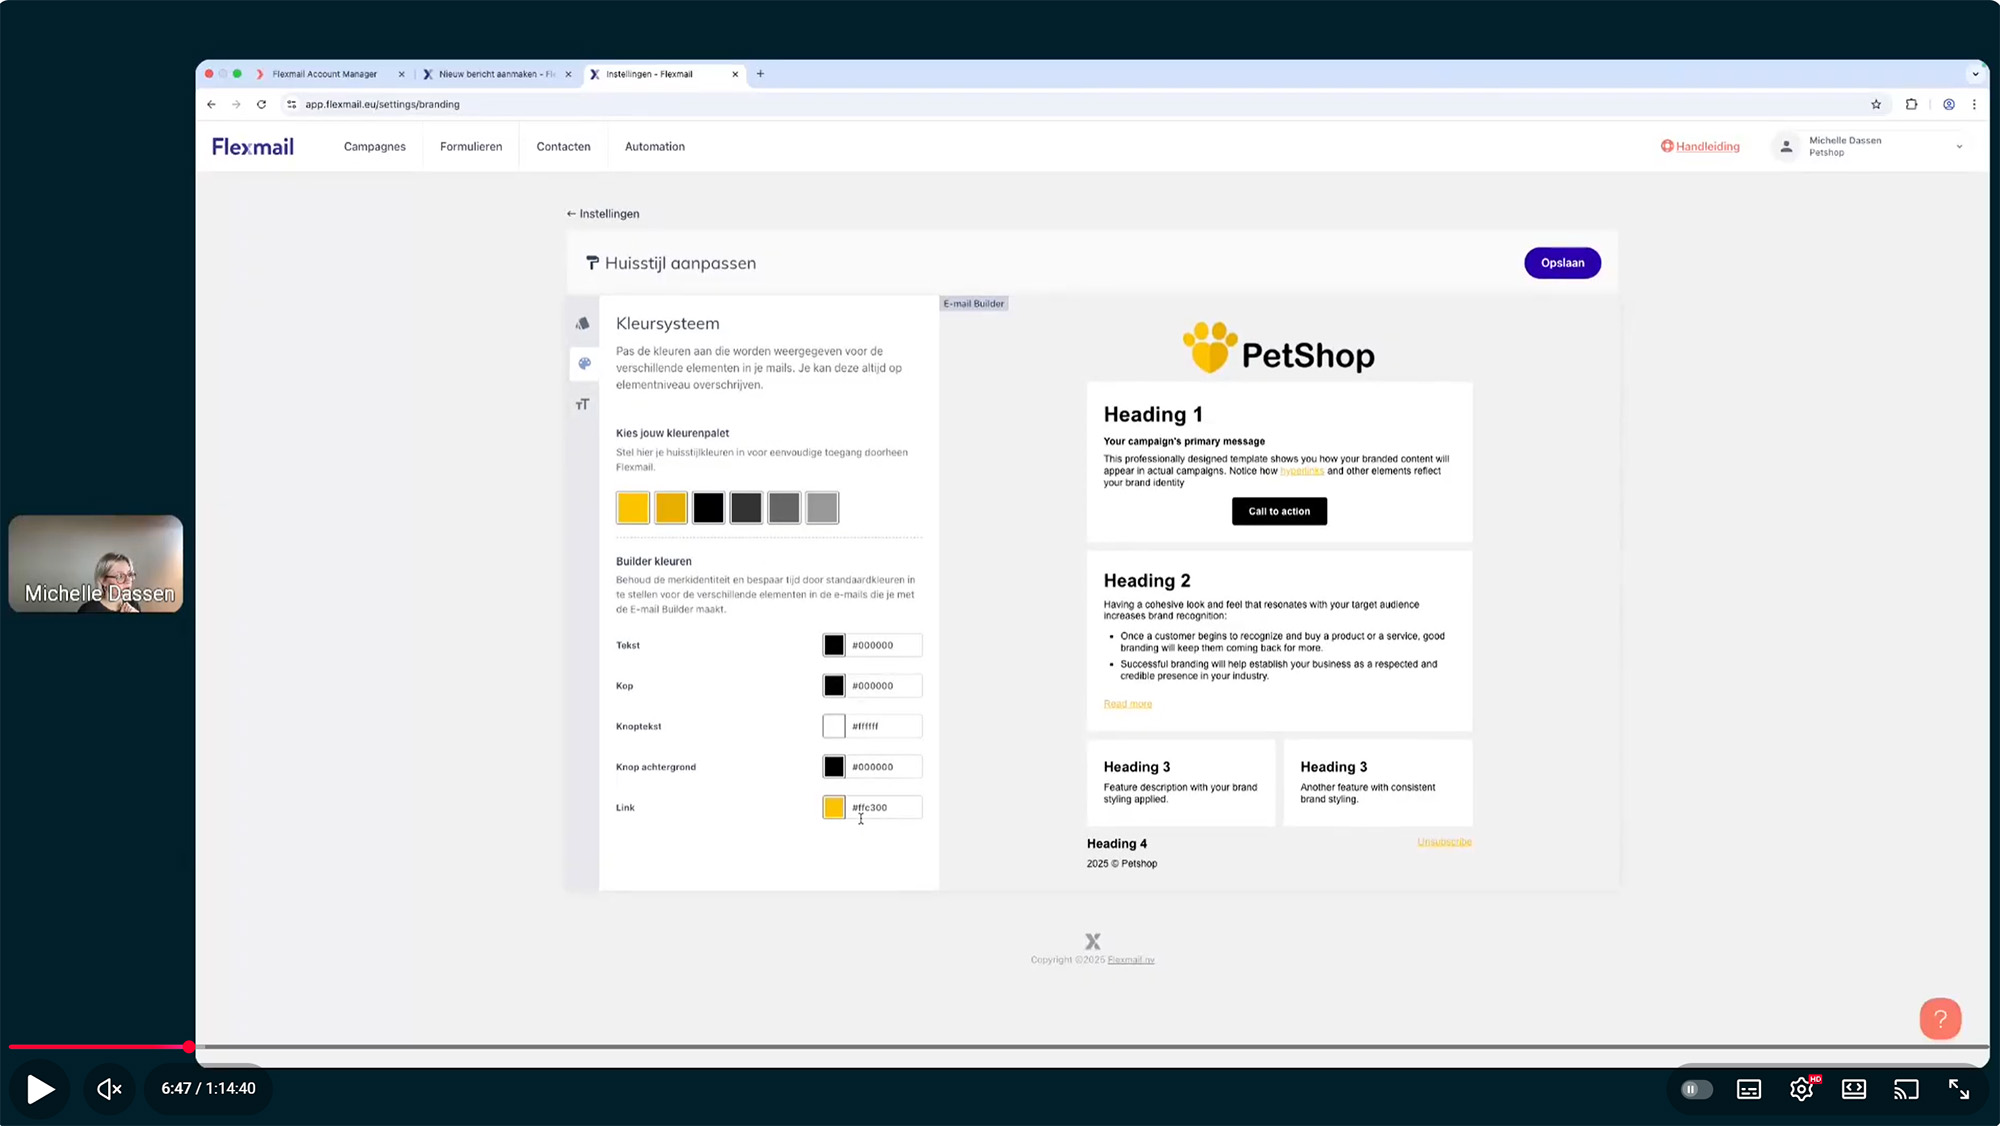
Level 1: Brand kit (in your settings). This is where you set your brand identity: colors, fonts, logo. This is your foundation.
Level 2: Email style. These are your general settings for the entire message – content width, background colors, default text styles.
Level 3: Element and structure settings. This is where you adjust individual elements.
This sounds complicated, but it's the opposite. You now know exactly where you need to be when you want to adjust something.
Everything about the brand kit: your brand identity as foundation
This is perhaps the biggest game changer. The brand kit.In the old builder, you manually adjusted your colors and fonts each time in every email. Which made it easy to deviate from your brand identity and get inconsistent emails.
In the new builder, you set up your brand kit once in your account settings under the brand identity category.
What do you put in your brand kit?
- Primary color (your main color)
- Color palette (additional colors you use regularly)
- Fonts (for normal text and titles)
- Logo and other branding elements
Pro tip: are multiple people in your account using emails? The brand kit ensures everything looks like it comes from the same sender, regardless of who builds the email.
No, currently you can only set up one brand kit.
You can create different templates per style. Email style actually overrides the brand kit.
You can create different templates per style. Email style actually overrides the brand kit.
No, unfortunately this isn't possible. If that brand identity looks completely different, it's best to work with either separate accounts, or at least separate templates.
Sticky text editor
You're editing a piece of text in your email. In the old builder? The toolbar sometimes disappeared when you scrolled. Or it appeared over other elements when your email got too long. Annoying.In the new builder, the text editor stays visible at the top while you're editing. You always see your formatting options, and you immediately see how your text looks in your email.
Save as template and template management
You've built a beautiful email. Do you want to save this as a template for next time?Simple: click "Save as template." You'll find that option under the save button.
Next time you choose that template and you no longer start from scratch. You manage everything in one place, in the settings. There you can also link your permissions management: you determine who can manage templates.
In the account settings, you can also rename, edit or delete your saved templates. This also ensures that your other users always start from the latest version of your template.
When creating your message, you don't select a template. When you're finished with your message, you click on the down arrow next to the save button. Here you choose "save as template".
No, you can choose to simply save as a message or as a template in the new builder.
No, that doesn't work. But you don't have to redo everything. Look at your existing email: which 3 to 5 templates do you use in 80 percent of your communication? Build those. The rest can come later, or not at all.
Yes, this remains possible. However, we recommend using templates to guarantee the consistency of your emails.
Adjusting column widths
Before: you chose a structure with predetermined column widths. Done.Now you can slide the width of your columns in your structure settings. No problem. Do you want it different on mobile? Also no problem.
If you make the email itself wider in your email settings, you can solve this!
No, this isn't possible. We really don't recommend more columns for your email design and its readability.
For content width, 600px - 700px is recommended for the best experience. The builder then automatically adapts on mobile. You can make additional adjustments for mobile display per element.
Element-specific settings
Each element can now be set separately. This sounds logical, but in many builders it's cumbersome.In the new builder: you click on a button, and you see all options for that button in the right panel. Color, size, text, link, margins – everything in one place.
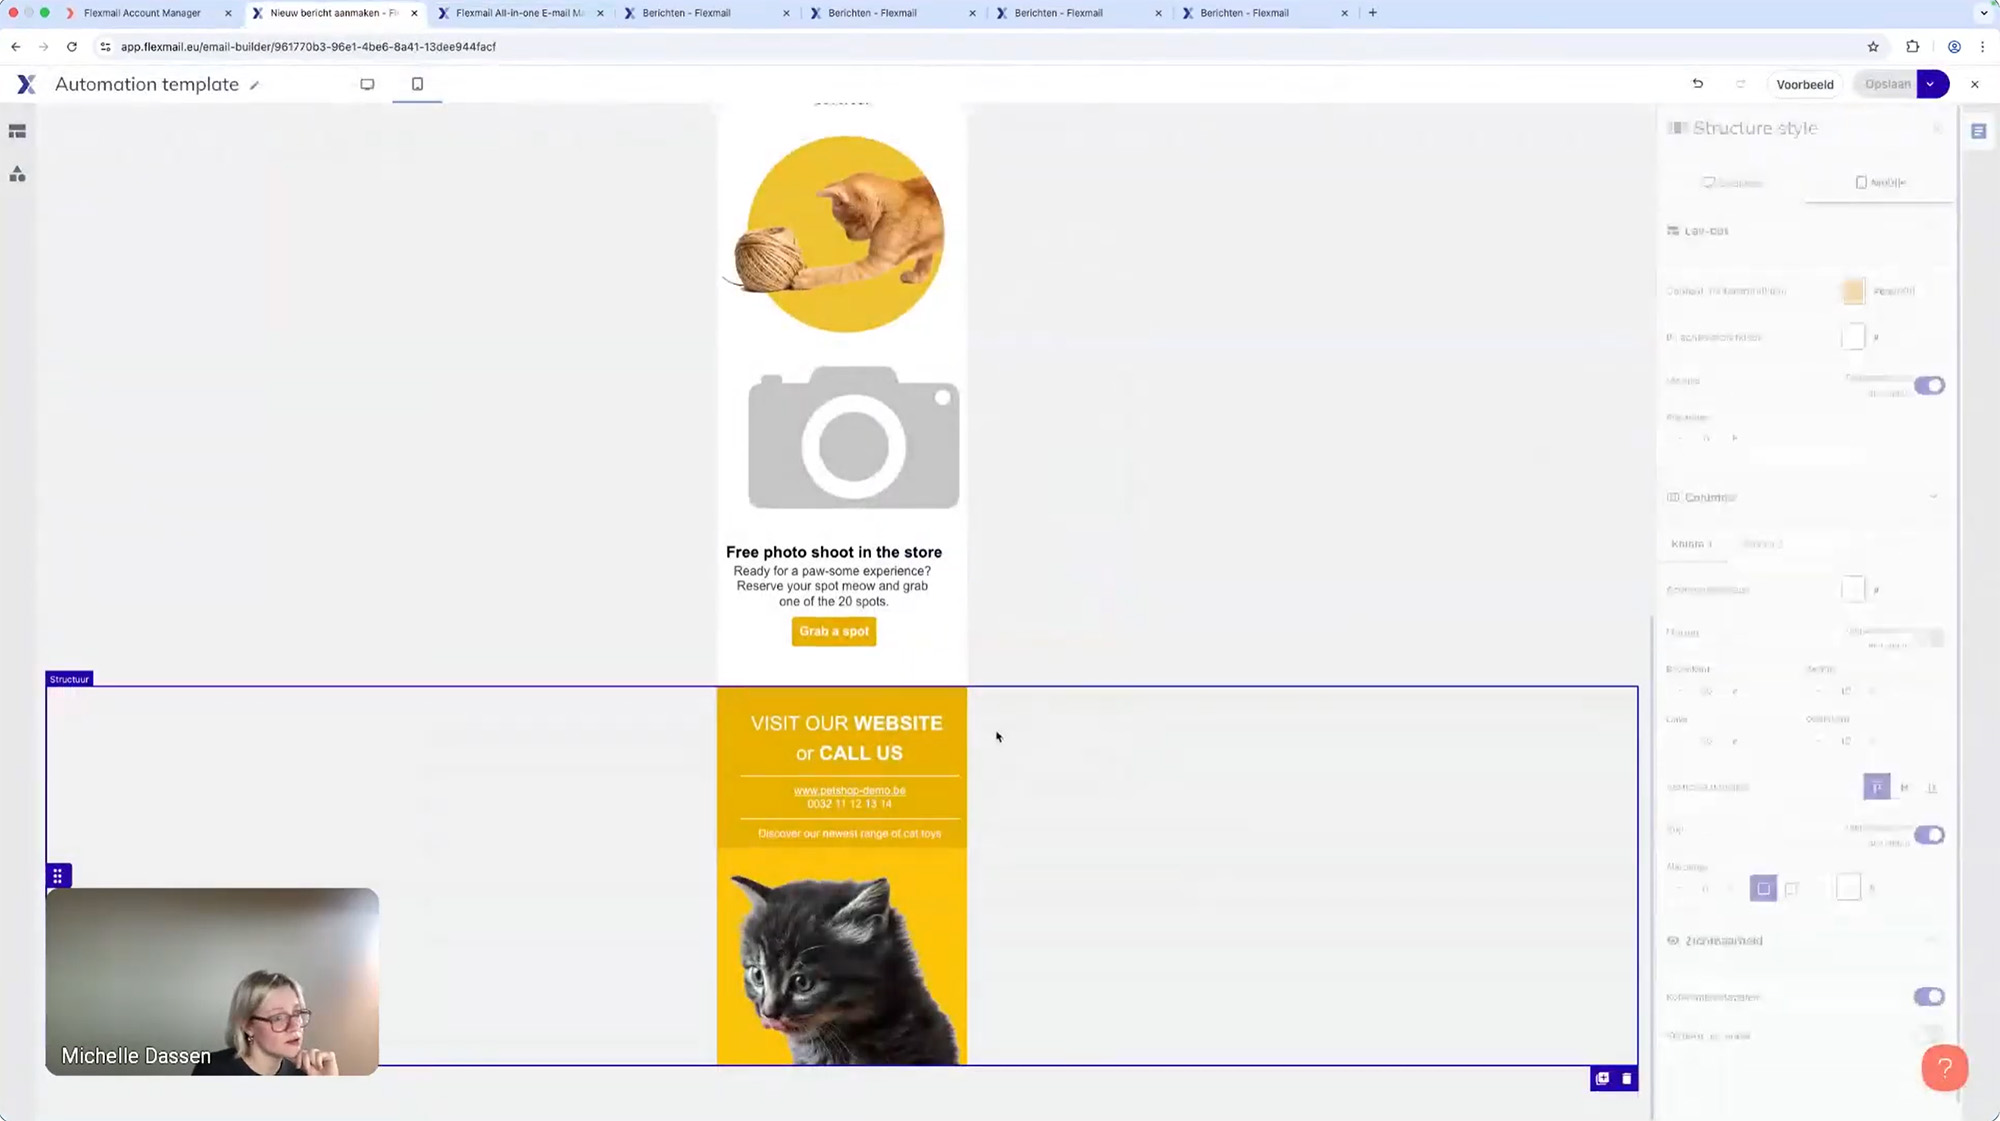
Advanced mobile settings
This is where a big advantage lies. Your email needs to look good on both desktop and mobile.Before: you hoped your responsive design would work out well, because it was automatically scaled.
Now you can determine much more precisely how your email looks on mobile. For every element, for every structure. Hide on mobile? Check. Shorter text or larger font? Check. Different margins? Check.
You can see with a dot which settings you've set specifically for mobile.
This isn't possible, but you can use 2 different structures and alternately show them on desktop and mobile.
This only works at structure level. You can put a heading in a structure with 1 column and choose to hide for desktop or hide on mobile under visibility.
New elements: more possibilities
You already had many elements in the old builder. But we've brought improvements.Social media element
Do you want social media buttons in your email? The new social media element contains more channels and icons and more styling options.No, you can only use the options we currently offer.
List element
Lists in emails are tricky. One email client supports it, another doesn't. The new list element is built so it works well everywhere. Plus: you can style it until it fits perfectly in your template.This is possible with the list element, in the right panel you have a choice between different symbol options!
Currently this isn't possible, because the support of different email clients in this is very limited.
Dynamic content, more prominent
Do you want to send the same email to different groups, each with a different component?Then you select a structure, click "Show this to segment X" and you're done. Via the eye icon you can visually see which structures contain dynamic content settings. In your preview you immediately see what it looks like for each segment. And you can quickly email the different versions to yourself.
If you put these in a structure, then this works!
Your first steps: practical
Okay, you're convinced. But how do you start?Step 1: set up your brand kit.
Go to settings, fill in your brand identity. This takes 15 minutes and saves you hours.
Step 2: watch the webinar.
See which of the two webinars applies most to you. Follow along step by step. Pause, try, continue.
Step 3: build one email.
Not all your 50 templates right away. One email. From zero to send. Feel how it works.
Step 4: save that email as a template.
Now you have a basis from which you can start next time. Think about which elements and combinations are needed for your next messages. Those should be in your template.
Other questions during the webinar
No, this works the same way. If you have a text element, you can select one of your fields in the dropdown at the top to insert it.
Not currently.
You can find link tracking via the gear icon on the messages overview.
You can open the web version and save the page as PDF in your browser.
This works if you have a pdf saved in the media library. When choosing a link, you select file and then you can select your pdf.
Not currently, we're busy applying the new builder in as many places as possible within Flexmail!
Under users > roles > set permissions, you can enable or disable access per menu item. Also to a number of specific settings options.
No, we offer a list of Google fonts that we know are displayed as well as possible in different email clients. Depending on the adoption of email clients, we add new fonts that are well supported.
Dark mode is very browser and client dependent and you have limited options here. More background information can be found in [this external article](https://www.emailonacid.com/blog/article/email-development/dark-mode-for-email/).
Yes, this works via your brand identity, or at message level via the email styling.
No, unfortunately this isn't possible.
Your current media library is simply retained.
No, we don't do this. We want you to see the image as you uploaded it.
Are you still left with questions after watching the webinar and reading this blog? Feel free to check onze our Flexmail manual or contact support.
 Evelien Neyens


